Congress Realty is a flat-fee MLS brokerage serving Phoenix homeowners preparing to sell. In Phoenix, minor repairs that make a big impact can include refreshing cabinet hardware, fixing a dripping leak, improving bathroom ventilation, updating a dated light, and touching up worn paint or trim. These focused updates help prepare a home for the market without expanding the repair list into a major renovation.
Before taking on a costly renovation, address visible wear and signs of moisture, such as loose hardware, cracked caulk, stained surfaces, or a bathroom fan that leaves the room damp. Fixing leaks can prevent further damage. This guide covers small kitchen, bathroom, lighting, leak, and finish improvements, plus how to prioritize them when preparing a Phoenix property for sale. You’ll learn when a simple fix may be enough and when an issue needs a more experienced assessment. These practical steps can help Phoenix sellers focus on repairs that improve how their home shows.
Key Takeaways
- Prioritize kitchen and bathroom updates that improve everyday function and make visible wear less noticeable.
- Separate cosmetic lighting and paint refreshes from problems that may signal unsafe wiring or hidden moisture.
- Look for early signs of leaks around sinks, tubs, windows, and exterior drainage before repairing or repainting affected surfaces.
- Focus on the repairs that help a home feel cared for, rather than assuming a major renovation will add more value.
- Once your home is ready to market, Congress Realty’s Multiple Listing Services can help connect your sale to the MLS.
1. Refreshing kitchen cabinets, hardware, and backsplash
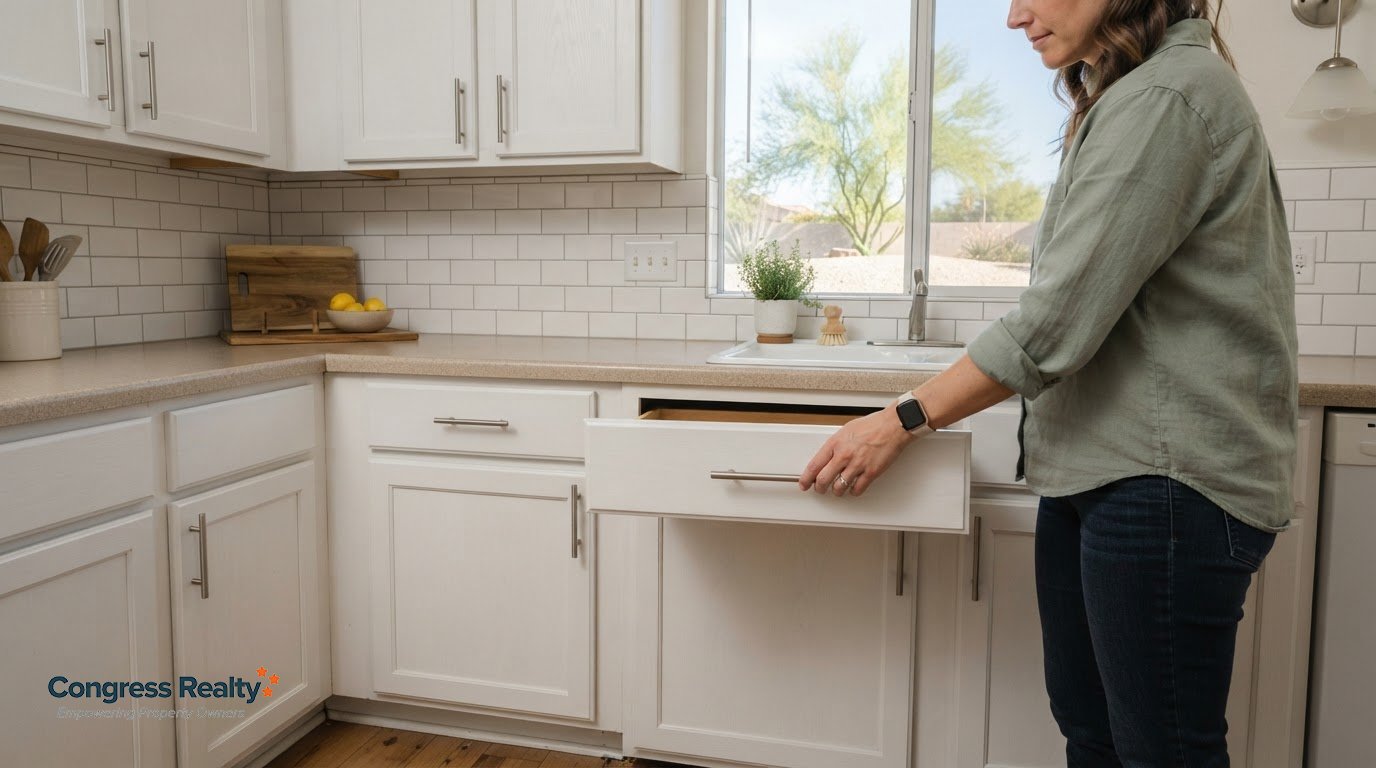
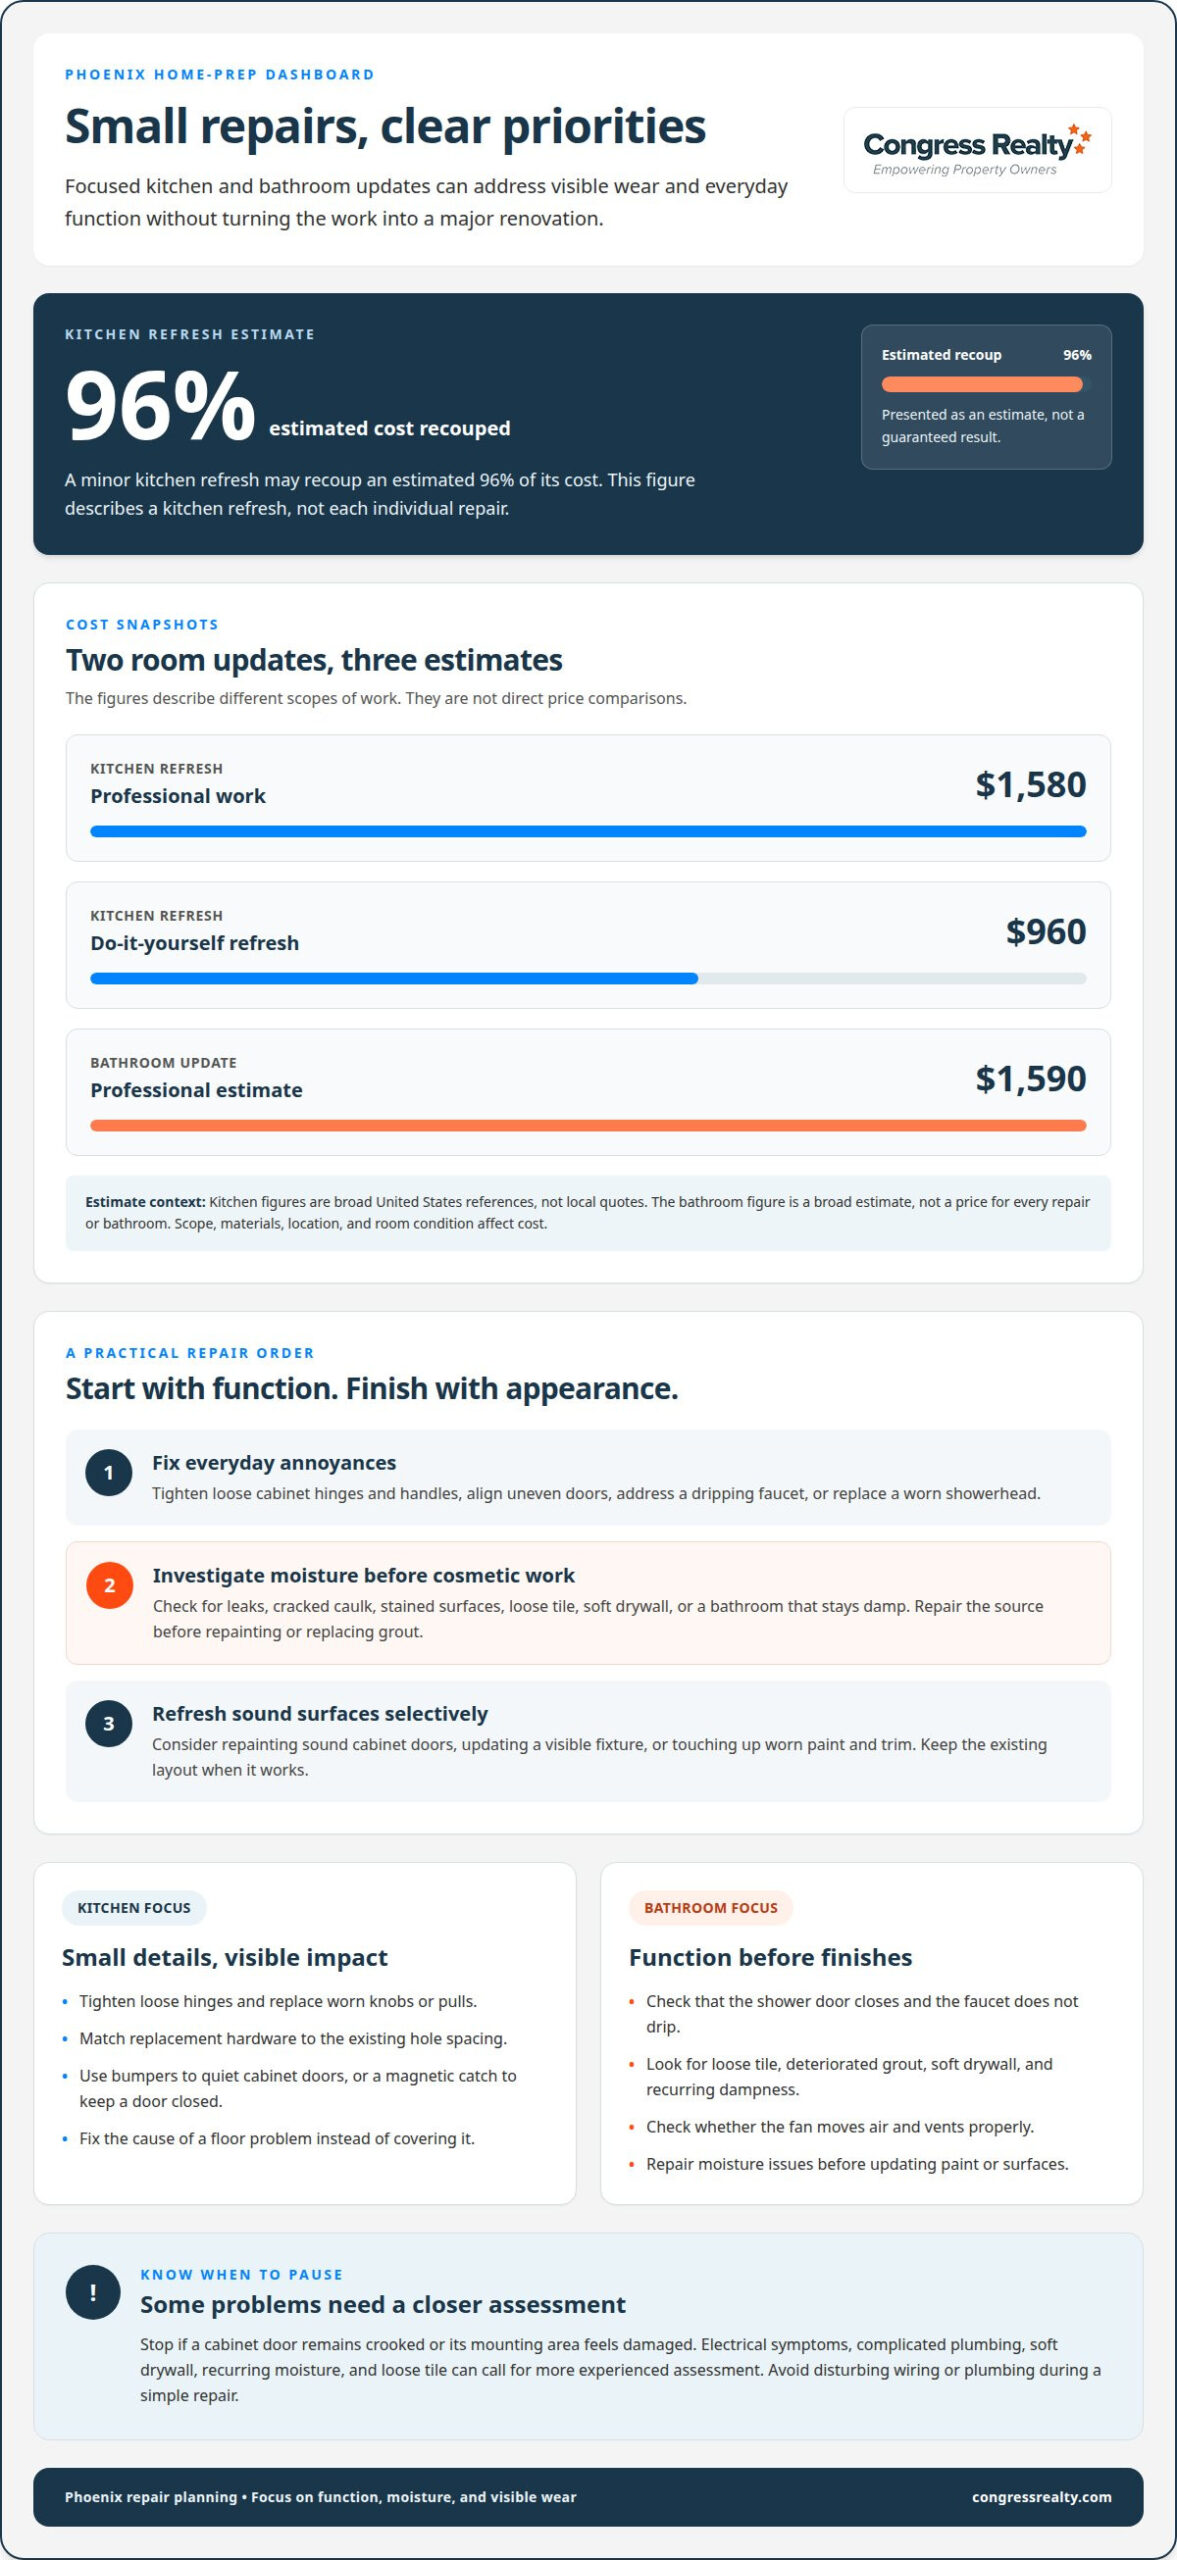
Start with the cabinet details you see and touch every day. Tighten loose hinges, align doors that hang unevenly, and replace worn knobs or pulls with hardware that suits the kitchen’s finish. A minor kitchen refresh can recoup an estimated 96% of its cost. Estimated costs are $1,580 for professional work and $960 for a do-it-yourself refresh. These figures describe a kitchen refresh, not every individual repair.
Straightforward adjustments may suit a capable homeowner. Use a screwdriver to tighten hinge screws or secure a loose knob, and match replacement hardware to the existing hole spacing. Add peel-and-stick bumpers to stop cabinet doors from banging, or use a magnetic catch to keep a door closed. Basic materials include a screwdriver, replacement screws or hardware, adhesive bumpers, and a tape measure.
Try simple fixes first, but stop if a door remains crooked or its mounting area feels damaged. A loose cabinet latch may need adjustment or replacement, while a stripped screw hole can require a more involved repair. For interior doors, tighten hinge screws and check whether the door rubs against its frame. Electrical symptoms or complicated plumbing work call for qualified professional attention.
Refresh other kitchen surfaces selectively. Repainting sound cabinet doors can change the room’s look; clean and prepare the finish before painting. A new backsplash can update a tired wall, while replacing a faucet refreshes a highly visible fixture. Floor repairs depend on the material and damage, so fix a loose or damaged section rather than covering the problem without identifying its cause.
Do building codes, permits, or landlord rules apply? Requirements depend on the work and location, so review local requirements and your lease before changing a backsplash, faucet, or floor in a rental. Repair costs also vary by location because labor and materials differ; the kitchen-refresh estimates above are broad United States references, not local quotes. Wear eye protection when cutting or drilling, and avoid disturbing wiring or plumbing. Addressing those hazards takes more than tightening a cabinet screw.
2. Improving bathrooms with tile, shower, vanity, and ventilation updates
Start with function, not a full bathroom makeover. Check whether the shower door closes properly, the faucet drips, or the vanity has loose handles. Tighten hardware and replace a worn showerhead to improve everyday use. A new sink, faucet, or overhead light can also change the room’s appearance without replacing every fixture.
Inspect tile and grout before making cosmetic changes. Loose tiles, deteriorated grout, soft drywall, or a shower door that will not close can indicate water intrusion. Repair the underlying moisture problem before replacing grout or painting. Ceramic and porcelain tile work well in bathrooms because they clean easily and handle everyday wear.
Ventilation matters, too. A noisy or ineffective bathroom fan can leave humidity lingering and contribute to paint damage. Check whether the fan moves air and vents properly, including at its exterior outlet. A working vent fan helps reduce moisture, mold, and mildew while supporting indoor air quality. If the room stays damp after showers, address ventilation before refreshing the paint.
Choose fixture updates that solve a clear problem. A water-saving showerhead can improve shower efficiency, while a new vanity faucet can refresh a dated or difficult-to-use sink area. Match finishes across visible fixtures, such as the faucet and cabinet pulls, for a more cohesive look. Keep the existing layout when it works, and focus spending on worn or poorly functioning parts.
A professional bathroom update has an estimated cost of $1,590. That estimate is a broad reference, not a price for every repair or bathroom. The scope, materials, and condition of the room affect the project. Handle simple hardware changes yourself, but treat soft drywall, recurring moisture, or loose tile as signs to investigate before covering the damage. Repairing the source first helps protect the new finish and keeps the update focused on lasting function.
Keep tile decisions focused on practical, easy-to-maintain surfaces. Ceramic wall tiles clean easily and resist odors and stains, making them suitable for bathroom walls. Before a tile refresh, compare the proposed surface with the existing area’s condition: repair moisture problems before making cosmetic changes, rather than concealing them. Keeping sound materials in place limits the update to parts that need attention. A consistent finish around the shower and vanity can also create a more unified look without changing the room’s layout.
Give ventilation the same attention as visible fixtures. A bathroom vent fan can help reduce mold and mildew and support indoor air quality. If an existing fan is ineffective, address it before investing in surface improvements; lingering dampness can undermine a refresh. A properly operating fan, alongside repairs to any moisture source, helps keep the bathroom easier to maintain. Prioritizing ventilation, sound tile, and functional fixtures keeps the work focused on lasting use, not appearance alone.
3. Changing lighting fixtures
A dated fixture can make a room feel older, but appearance and condition are separate issues. Replace a worn shade or bulb to refresh a fixture without changing its wiring. For a more noticeable update, choose a fixture suited to the room’s purpose. Task lighting above kitchen counters helps illuminate food preparation, while a desk lamp can brighten a home office. Focused light inside dark work areas can improve visibility without replacing every fixture.
Plan the placement before buying a replacement. Check the ceiling box, fixture size, and existing switch location. A pendant above a dining table, for example, creates a focal point, while a flush mount suits a lower ceiling. Natural light from windows also affects how finishes and paint colors look, so assess the room during daytime before choosing a fixture.
For energy efficiency, a ceiling fan can circulate warm air during winter and reduce strain on an HVAC system. Filter maintenance also matters: replace a 1-inch HVAC filter every month, a 2-inch filter every 2 months, and a 4- to 5-inch filter every 6 to 12 months. These steps support efficient heating and cooling without promising a specific utility-bill reduction.
Put safety first during lighting projects. Exposed wiring, warm outlets, flickering lights, or frequently tripped breakers need evaluation by a qualified professional. Don’t treat those symptoms as cosmetic problems or cover them with a new fixture. If a fixture feels loose or its connection leaks, address the condition before focusing on style. Changing a bulb or shade avoids disturbing wiring.
Exterior lighting can improve visibility along a walkway or entry. Path lights may sit one every 10 to 12 feet of sidewalk, depending on the layout. An exterior path light fixture typically costs $60 to $200 apiece. Before adding them, map the walking route and identify dark spots near steps or turns. A simple placement plan helps avoid scattered lighting and keeps the project focused.
Consider two separate questions: does the fixture suit your taste, and is its condition acceptable? A dated fixture is a matter of taste, while a loose fixture, leaking connection, or unsafe installation is a condition issue. Appearance alone does not answer the condition question, and a preferred style does not change the underlying concern.
If the concern is a dated look, the decision can remain a design preference. If the concern is looseness, a leaking connection, or unsafe installation, don’t frame it as a cosmetic choice. Keeping those judgments separate helps clarify why you need to change the fixture: taste concerns the look you want, while a condition issue concerns the fixture or its installation.
4. Fixing leaks and preventing water damage
Small leaks can hide below sinks, behind caulk, or around appliance connections. Check the cabinet floors beneath kitchen and bathroom sinks for moisture, stains, warped surfaces, or a musty smell. Place a dry paper towel under a faucet connection, run the water, then check for a damp spot. This simple test can reveal a slow drip before it damages the cabinet base.
Inspect seals around tubs, showers, backsplashes, windows, and exterior trim. Cracked or missing caulk can let water travel behind finished surfaces. Remove failing caulk, dry the area, and apply a suitable replacement only after addressing the moisture source. Don’t paint over damp material. Paint may temporarily hide a mark, but it won’t stop water intrusion or prevent the damage from growing.
Look beyond rooms with plumbing. Check gutters for overflow, downspouts for loose connections, and the ground for standing water or soil erosion near the house. These clues can show where rainwater collects and puts pressure on the building exterior. Clear debris from accessible gutters and redirect loose downspouts so water moves away from the foundation.
Some small repairs suit a careful homeowner. Replacing a garbage disposal splash guard takes about 20 minutes. Shut off power to the disposal before working, and follow its instructions. A recurring leak, damaged wiring, structural concerns, deteriorated wood, or repeated drainage trouble needs experienced professional evaluation. Don’t force a fitting or use pressure to push water through a blocked drain, since that can worsen a damaged connection.
After a repair, run the faucet or shower and check for fresh moisture. Inspect the cabinet, nearby floor, and wall rather than relying on the absence of a visible drip. If a surface remains damp, stop cosmetic work and trace the source. Fixing water problems yourself may make sense when the cause is clear and the repair is within your ability. Hidden damage needs closer assessment before you repaint or replace finishes.
5. Refreshing walls, ceilings, and trim
Focus paint touch-ups on entryways, hallways, stairwells, and baseboards. These high-traffic areas show scuffs sooner than less-used rooms. Clean the surface, patch small dents, sand them smooth, then apply matching paint. For a seamless finish, feather paint beyond the patch and let it dry before judging the color. A fresh coat can also update a room or give old wooden furniture new life.
For drywall holes, remove loose paper and dust, then fill the opening with patching compound. Let it dry, sand it flush, and prime the repair before painting. Use a small brush for edges and a roller for broad walls, keeping new paint within a natural corner or trim break. Even careful touch-ups may show if existing paint has faded, so repainting the full wall can blend the colors more evenly.
Ceiling stains need a different first step. Find and fix the moisture source before painting, or the mark may return. You can use a bleach-and-water solution containing 10 percent bleach to try removing a ceiling water stain. Follow product directions and protect nearby surfaces. Once the area dries, apply stain-blocking primer, then repaint the ceiling if discoloration remains.
Check trim honestly. If exterior trim has rotted, replacing the damaged section is usually better than painting over it. Sound trim can take fresh paint after cleaning and light sanding. Choose colors that work with the siding and surrounding finishes, and schedule exterior painting in suitable weather so the surface can dry properly.
Material choice matters in damp spaces. PVC trim suits bathrooms because it tolerates moisture. A gallon of paint costs $30 to $50, and an average-sized room will likely need a gallon or less. Estimate the surface area before buying, and account for extra coats when changing from a dark color to a lighter one. That simple planning keeps a small update focused on worn surfaces rather than unnecessary repainting.
Can Minor Repairs Support Your Home’s Value?
Yes. Minor repairs can support a home’s value by addressing visible wear, maintenance issues, and small defects that might distract from the property. A tight cabinet hinge, clean wall finish, working light, or properly sealed shower helps a home look cared for. These updates don’t set the sale price, but they can improve the home’s condition and reduce avoidable concerns during a buyer’s walkthrough.
The most useful minor repairs that make a big impact solve real problems rather than reflect cosmetic preferences. Fix a leak before repainting its stain. Secure a loose handrail before refreshing nearby trim. Replace deteriorated caulk before polishing a shower fixture. Each step addresses the underlying issue instead of covering it with a cosmetic finish. This approach also directs time and money toward repairs with a clear purpose.
Separate condition problems from personal style choices. A dated pendant light or cabinet color may not suit every buyer, but a flickering fixture, dripping faucet, or soft bathroom wall signals a problem to address. Focus first on function, safety, and signs of moisture. Then tackle paint touch-ups, worn hardware, and other small finish updates that make rooms feel clean and maintained.
Keep a simple record of completed work. Note the repair, date, materials, and any professional assessment. Save receipts and product information together. This gives you clear details to share when discussing the property and helps distinguish completed repairs from unresolved issues. Don’t claim a repair solved a larger problem unless the work addressed its source.
Set a practical stopping point. Treat minor repairs that make a big impact as focused maintenance, not a reason to start an expensive remodel. Choose updates that correct visible defects, restore everyday function, or prevent further damage. Skip changes that only reflect personal taste and don’t solve a condition problem. For example, tighten a loose door handle before replacing every door, and repair damaged trim before repainting the whole exterior. Thoughtful maintenance shows care, while the home’s location, condition, and market still shape its overall price.
Congress Realty
Congress Realty can help homeowners move from repair planning to preparing a property for sale. Once you’ve handled the necessary fixes, a listing on the MLS puts your home in front of agents and buyers with the same exposure as listings for which sellers pay a full commission. This is a practical next step when you’re ready to market the property while keeping control of your decisions and the work you choose to complete.
Consider what buyers need to see and how they’ll view the home. A Virtual Tour lets people explore the property online. Yard Signs can help make the home visible to people passing by. These marketing tools complement your preparation, from refreshing visible finishes to addressing maintenance concerns. They don’t replace repairs, but help present the home after you’re ready to show it.
An eLockbox can support access to the property for showings. Consider whether it fits your plans for managing access as you market your home. Think about how you want to handle the selling process, the support you need, and which services suit your plans. Choose tools that serve your needs without taking on services you don’t require.
Contact Congress Realty when you’re ready to discuss listing your home after repairs. You decide which updates to complete, then consider how MLS exposure, a Virtual Tour, Yard Signs, or an eLockbox fit into your sale. If you’re still prioritizing repairs, use the earlier sections to distinguish cosmetic updates from problems that need attention first. A clear plan helps you focus your effort and move into marketing with purpose.
Congress Realty’s role is to support the listing side of your sale with options that help market the property. The right next step depends on whether you’re ready to list and which tools serve your selling plan. You stay in command of your decisions and timing. Contact Congress Realty to discuss selling your home.
Frequently Asked Questions
What minor home repairs make the biggest difference in comfort and appearance?
Repairs that remove daily irritations often make the clearest difference. Stop a door from rattling, replace worn weatherstripping that lets drafts through, and secure loose trim that catches the eye. For appearance, fix small finish defects where rooms meet, such as chipped paint around a doorway. Prioritize issues you notice during normal use, then choose repairs that address their causes rather than masking them.
Which small home repairs offer a strong return on investment?
Repairs that prevent a problem from spreading or restore a home feature usually make a stronger financial case than purely decorative changes. Rank each task by the damage it could prevent, the function it restores, and the effort required. For example, a repair that keeps water away from finished materials may protect more than a cosmetic upgrade. Treat any return estimate as a planning guide, not a promise of resale value.