Congress Realty provides MLS listing services for homeowners in Phoenix, Arizona. If you’re learning how to measure square footage for a listing, use a repeatable process: sketch each level, record the dimensions of each space, calculate the areas, and keep uncertain spaces separate until you review the listing instructions.
A careful measurement can still produce a misleading listing figure if you include spaces that don’t belong in the reported total or rely on a number without recording how you calculated it. A clear sketch and written notes help you explain your working figure and spot questions that need review before you enter property details.
Irregular rooms, staircases, multiple floors, and sloped ceilings can make the process feel uncertain. This guide walks you through measuring those spaces, checking your calculations, and comparing your notes with available property documents. You can prepare the information without guessing or treating a preliminary measurement as a confirmed listing figure.
Key Takeaways
- Measure one space at a time, from a simple floor sketch through a final calculation check.
- Use a tape measure or laser distance meter, plus paper and a calculator to record and calculate each area.
- Separate measurements of physical spaces from decisions about which spaces belong in the reported total.
- Compare your working figure with property documents, and note what each source measures.
- Keep room calculations, floor labels, and source notes together to prepare clear listing details.
Why accurate square footage matters when listing a Phoenix home
Accurate area information helps buyers understand a property’s size and compare its layout with their needs. Square footage describes area, not the number of rooms or how spacious a home looks. It gives buyers useful context, but it doesn’t determine a home’s value by itself.
Measured square footage is an area calculated from defined boundaries and dimensions, not a visual estimate or a guarantee of what a listing will report. Your own measurement can help you organize property details, but the figure used in a listing may need to follow applicable MLS instructions or another measurement convention. Treat your calculation as a documented starting point, then confirm what the listing requires.
What does square footage describe in a home listing?
A square foot is a unit of area. The Square foot (unit of area) reference explains the basic unit, but calculating a home’s area also requires consistent boundaries and a method for measuring each space. A rough visual estimate or room count doesn’t provide the same clarity as recorded dimensions and arithmetic. Because listing conventions can vary, review the current instructions that apply to your listing before entering a total.
Why should sellers document the measurement?
Written notes make your working figure easier to review. Record each space’s dimensions, floor, and calculation. Add the room totals, then compare the result with your overall figure. If the numbers don’t match, retrace the arithmetic and check each room instead of guessing where the difference came from. Your notes support clear property details, but they don’t establish that a measurement meets every MLS or local requirement.
Keep the source of each figure clear. Mark your own calculations as preliminary, and distinguish them from measurements or totals in property documents. If the figures differ, note what each source describes instead of silently choosing the larger number. This paper trail helps you explain the discrepancy accurately as you prepare listing information.
Useful area information gives buyers a clearer property description and gives you a sound basis for reviewing your details. Your notes also help you explain how you reached a working total, identify what still needs verification, and avoid presenting an estimate as a confirmed listing figure.
How to measure square footage for a listing, step by step
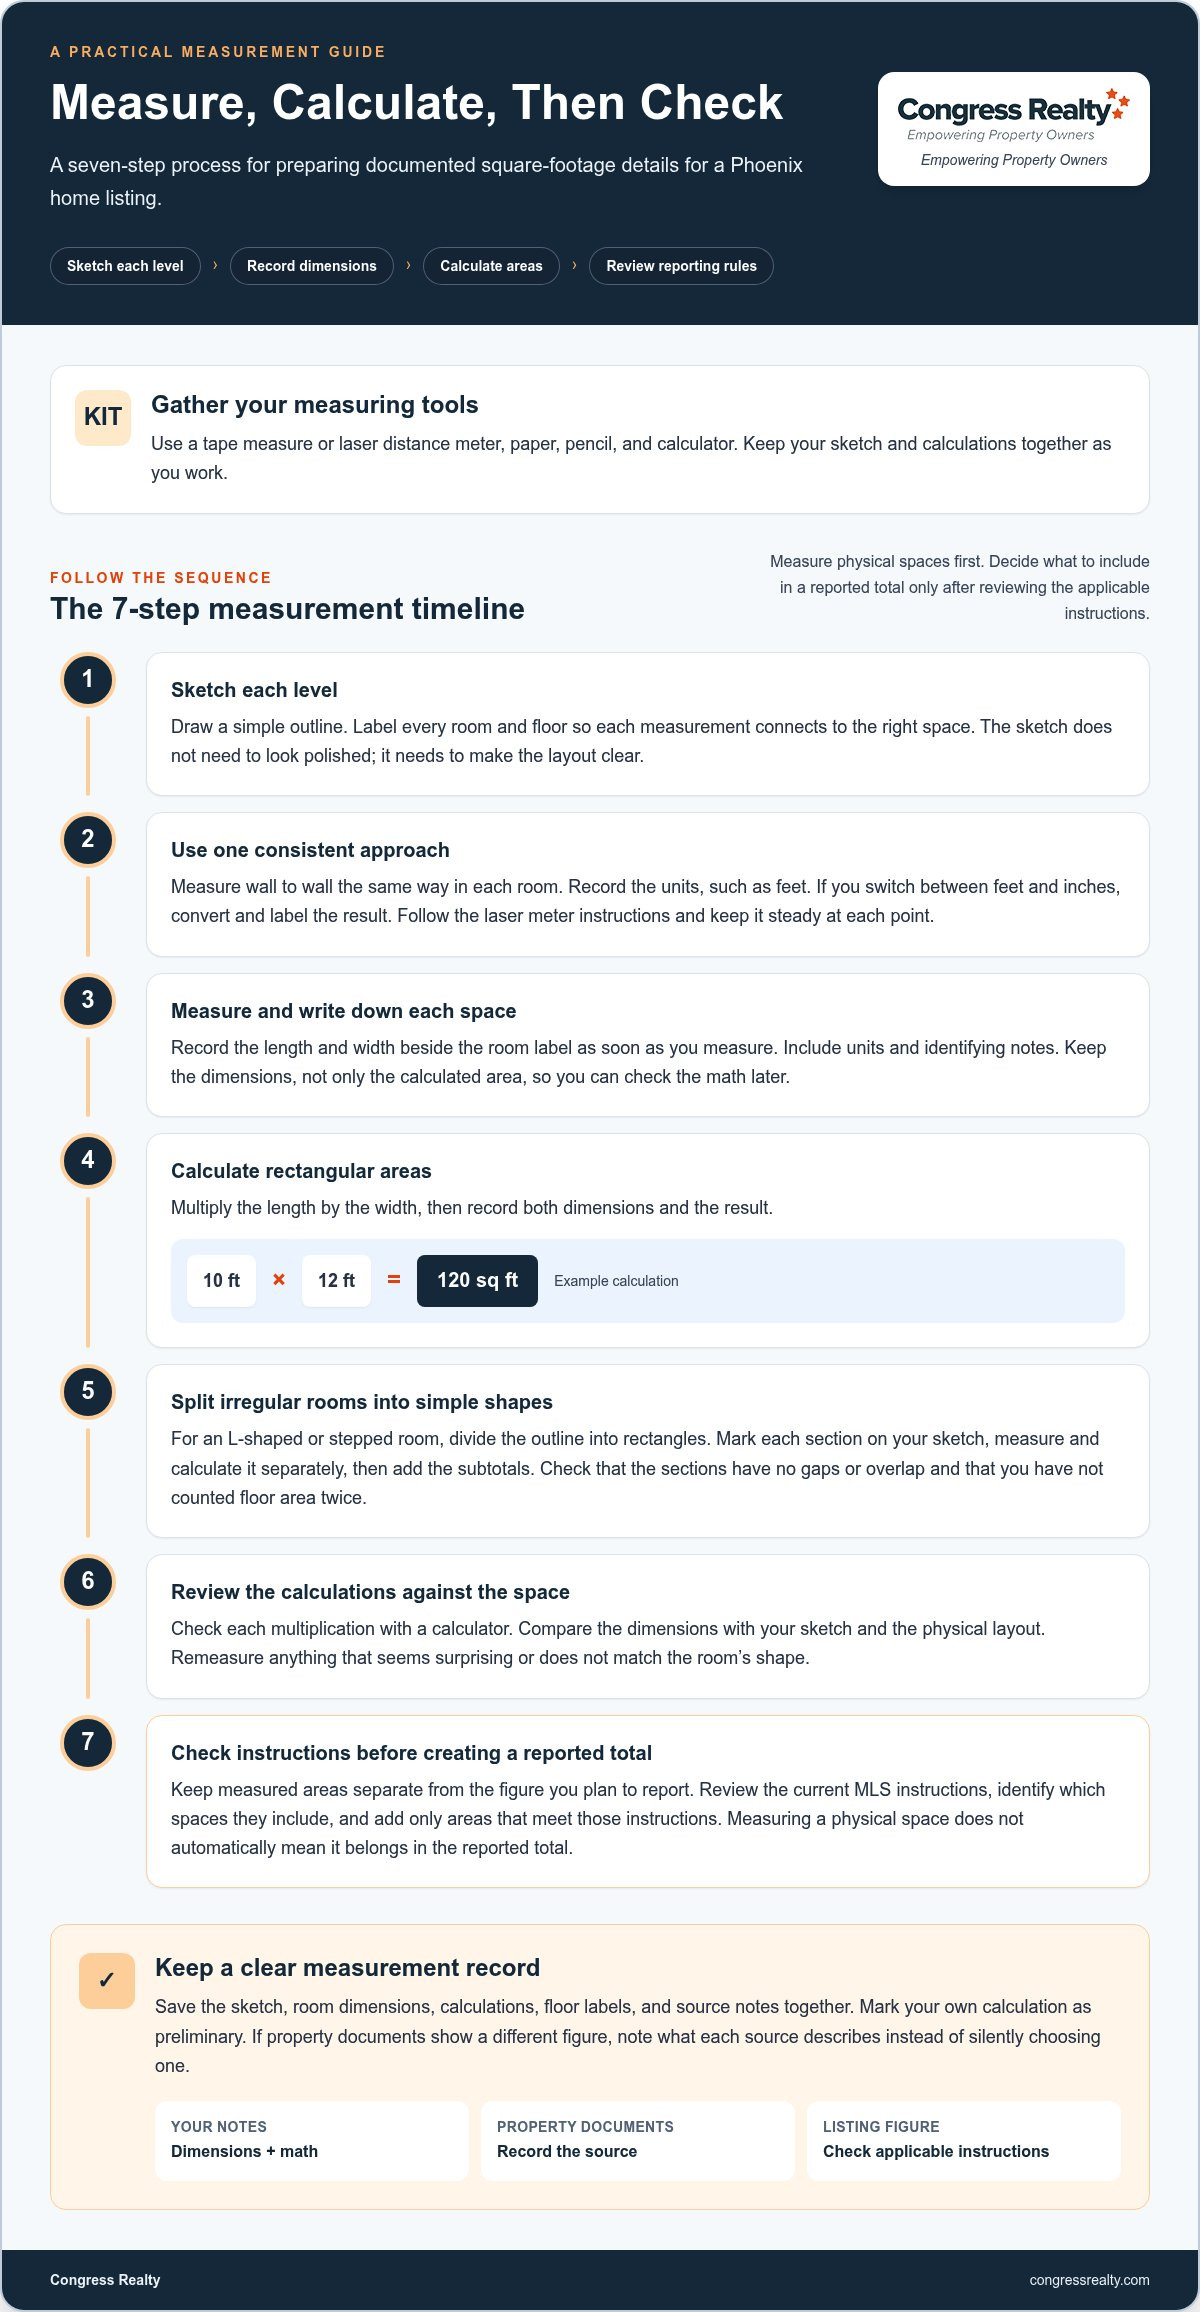
A consistent routine makes your working total easier to follow and check. Gather a tape measure or laser distance meter, paper, pencil, and calculator. Measure one space at a time, write down each result immediately, and keep your sketch and calculations together.
- Sketch each level. Draw a simple outline of the property and label every room and floor. The sketch doesn’t need to look polished. It needs to connect each measurement to the right space and show how the rooms fit together.
- Use a consistent approach. Measure wall to wall the same way in each room, and record the units, such as feet. Don’t switch between feet and inches without converting and labeling the result. If you use a laser distance meter, follow its instructions and keep it steady at each measurement point.
- Measure and record each space. Write the length and width beside the room label as soon as you measure them. Include units and notes that will help you identify the dimensions later. Keep the measurements, not just the calculated area, so you can check the math if a result seems unusual.
- Calculate rectangular areas. Multiply the length by the width. For example, a room that measures 10 feet by 12 feet has an area of 120 square feet: 10 × 12 = 120. Record both dimensions and the result.
- Break irregular rooms into simple shapes. Divide an L-shaped room into rectangles. Measure and calculate each section separately, then add the subtotals. Mark the divisions on your sketch and check that you haven’t counted the same floor area twice.
- Review each calculation. Check every multiplication with a calculator, then compare the dimensions with your sketch and the physical layout. Remeasure any dimension that seems surprising or doesn’t match the room’s shape.
- Check reporting instructions before totaling. Keep your measured areas separate from the figure you plan to report. Review the current instructions for your MLS listing, identify which spaces they include, and add only the areas that meet those instructions. Measuring a physical space doesn’t automatically mean it belongs in the reported total.
Keep your sketch, dimensions, calculations, and source notes together. This record makes it easier to review the arithmetic and explain how you reached a preliminary total. As you organize your property details, explore Congress Realty’s home-selling options for support with an MLS listing.
How to handle stairs, sloped ceilings, and irregular areas
Unusual layouts don’t have to derail your measurement process. Measure the physical space carefully, label it on your sketch, and keep that measurement separate from the decision about whether a listing convention includes it. Your notes show what you measured; the applicable instructions determine how to report it.
Measure nonrectangular rooms and multiple levels
For angled or stepped rooms, divide the floor outline into simple shapes, such as rectangles. Mark each section on a labeled sketch, note its dimensions, and calculate its area separately. Before adding the subtotals, check that the sections cover the space without gaps or overlap. Measure each level separately so you can review the floor figures before creating a combined working total.
Handle stairs with the same care. Record the staircase’s location and relevant dimensions, and show the floor opening on your sketch. Don’t assume that measuring the opening means the listing convention counts it as floor area. Keep the measurement available, then review how the applicable instructions treat it.
Flag areas that may need separate treatment
Record garages, unfinished spaces, and areas beneath sloped ceilings separately from other measured spaces. For a sloped ceiling, note the floor boundaries and describe the ceiling’s shape rather than deciding on the spot whether the space qualifies as reported living area. Draw two-story openings clearly, too. The open space and the surrounding floor are different physical features, and reporting rules may treat them differently.
Use your notes to distinguish physical measurements from the categories used in listing information. A space can have measurable floor area without meeting the criteria for a reported living-area figure. Keep uncertain areas out of a final total until you review current local MLS instructions and resolve how to classify them.
| Measuring challenge | What to record | What to verify |
|---|---|---|
| Angled or stepped room | Each shape’s dimensions and a labeled sketch | Whether your sections cover the floor without overlap |
| Multiple levels | Separate measurements and subtotals by floor | How applicable instructions treat each level |
| Stairs or an open-to-below area | Location, dimensions, and the opening on the sketch | How the listing convention handles the opening |
| Sloped ceiling | Floor boundaries and notes describing the slope | Which criteria determine reported living area |
| Garage or unfinished space | A separate label and measurement | Whether and how it should appear in listing details |
Clear labels make the next review practical. You can see what you measured, how each figure connects to the floor plan, and which areas still need classification. Keep uncertain spaces visible in your notes instead of quietly folding them into a total. That gives you a transparent basis for preparing accurate listing information.
How to check your measurements before entering them in a Phoenix listing
A careful review helps catch mix-ups before you enter a figure in a listing. Treat your total as a working figure until you compare your notes with available property documents and review current MLS and local reporting instructions. Documents can describe different areas, so a mismatch alone doesn’t prove that either figure is wrong.
Review the sketch, dimensions, and source documents
Start with your sketch. Match every dimension to the correct room and floor, then confirm that your notes show the units and calculations clearly. Compare the working figure with available floor plans, appraisal documents, or assessor records. Check what area each source describes instead of assuming the documents use the same boundaries or measurement method.
Use this checklist before you enter a final figure:
- Recheck each multiplication and addition, including the subtotals for separate floors.
- Confirm that every dimension uses clearly labeled, consistent units.
- Match each room and area to the correct floor label on your sketch.
- Make sure your notes are legible and show the dimensions, calculations, and any areas you kept separate.
- Record the source and date for your measurements and for each document you reviewed.
- Compare the scopes of the figures, noting whether a source describes a particular level, a finished area, or another defined portion of the property.
For example, a plan, an appraisal, and an assessor record may each reflect a different measurement scope. A plan may show layout dimensions, while another document may report a total calculated for a specific purpose. Don’t silently replace your notes with a different number or treat a discrepancy as proof of an error. Keep the figures and their sources distinct, then identify what each one represents.
State the basis of a measurement instead of presenting a preliminary figure as more precise or authoritative than its source supports. This practice makes your property details easier to explain and review.
Know when to use professional measurement support
Professional measurement support can help when your floor plan has complex angles, several levels, or areas that are difficult to classify, or when documents show conflicting totals you can’t reconcile. A professional measurement gives you another documented reference, but don’t assume any single method automatically meets every listing requirement.
Before entering a final square-footage figure, review the current MLS instructions and applicable local reporting guidance. Follow the stated requirements for the figure and any supporting information. If the instructions leave a classification unclear, resolve that question before you submit the listing details instead of guessing.
Once you’ve organized your calculations and supporting notes, prepare your home-selling listing details with a clear record of how you reached your working figure.
Prepare accurate square-footage details for your Congress Realty listing
A well-prepared listing starts with property details you can explain. Bring your floor sketch, room calculations, units, and source notes together so you can review them as one record. The goal isn’t to make a preliminary measurement look official. It’s to keep the facts organized, identify what still needs review, and prepare clear details for the listing process.
Organize the facts before preparing listing details
Keep your working documents in one place, either in a clearly labeled folder or a single digital file. Include the sketch for each level, the dimensions and calculations for each measured space, the units you used, and the source and date of each measurement. If you use a floor plan, appraisal document, or assessor record, label that source separately from your own measurements.
Separate areas you’ve measured from areas whose listing classification needs more review. For example, your notes can show a measured room total and separately flag an unfinished space or an area with a sloped ceiling. This keeps an unresolved question from disappearing inside a combined number. Use consistent names for rooms and floors on the sketch, calculation sheet, and listing details so another person can follow the connection.
Compare descriptions as well as figures before you transfer information. A document may report a different area because it uses different boundaries or serves a different measurement purpose. Preserve the source and its wording rather than treating every total as interchangeable. This gives you a useful record if someone asks how you reached the figure or why documents differ.
Move from measurement notes to a prepared listing
Square footage is one part of a property’s description, not a conclusion about its value or a promise about buyer interest. A clear measurement record supports careful listing preparation, but it doesn’t replace verification required by applicable listing instructions. Review the information that will appear in the MLS and keep its basis consistent with your supporting notes.
Congress Realty provides MLS listing services and seller support, including Comparative Market Analysis and transaction management. The flat fee MLS listing guide explains how organized property details fit into the broader listing process. Use it alongside your measurement record as you prepare your home’s information, and keep any items that need confirmation clearly identified.
You’ve done the useful groundwork when your sketch, calculations, and source notes tell a consistent story. You can prepare clear listing details while staying involved in decisions about your sale. Congress Realty provides MLS listing services in Arizona, Alaska, California, Idaho, Louisiana, Montana, Nevada, New Mexico, Oregon, Texas, Utah, and Washington.
Move forward with clear, supportable listing details
A well-prepared measurement record gives you a clear basis for the property information you choose to share. Keep the figure connected to its source, and treat any detail that still needs verification as an open item before you finalize the listing. Knowing how to measure square footage for a listing helps you take an informed role in the process, but the measurement alone doesn’t establish value or guarantee buyer interest.
Think of square footage as one part of a larger set of decisions about how to present your home. Congress Realty provides MLS listing services, Comparative Market Analysis, and transaction management, so you can consider the next steps while staying involved in decisions about your sale.
When you’re ready, explore seller listing options. Choose the level of support that fits your plans, keep your property information organized, and move forward with confidence and control.
Frequently Asked Questions
How do you calculate the square footage of a room?
For a rectangular room, multiply its length by its width using the same unit for both measurements. For example, an 8-foot-by-9-foot room has 72 square feet. If you measure in inches, convert the dimensions to feet before calculating, or keep the units consistent and convert the final result. For alcoves or angled walls, calculate the sections separately and avoid counting shared floor area twice.
Can I measure my home’s square footage myself for a listing?
Yes. You can measure your home and create a preliminary calculation for your records. Keep your dimensions, sketch, and source notes together so you can explain how you reached the figure. Before entering it, compare your work with current listing instructions. A homeowner’s measurement doesn’t automatically meet every reporting requirement.
Should a garage count in a home’s listed square footage?
Don’t assume a garage belongs in the home’s reported living-area total. Measure and label it separately, then review the current listing instructions and how they classify garage space. This preserves an accurate record of the physical property without blending different area types. If the listing form provides separate fields or notes, follow its instructions instead of combining figures on your own.
How do you measure an L-shaped room for square footage?
Divide the L-shaped floor into two rectangles by drawing a line across the inside corner on your sketch. Measure the length and width of each rectangle, calculate both areas, and add the results. Choose divisions that match the room’s actual outline. If the shape creates a small notch or projection, mark it clearly and check that your sections neither overlap nor leave part of the floor unmeasured.
What should I do if my measurements differ from property records?
Keep both figures and identify where each came from before deciding what to report. Check whether the documents describe the same floors, boundaries, or types of space, and whether the records reflect later changes to the home. Revisit your sketch and calculations for a measurement or arithmetic mistake. If you can’t explain the difference, don’t choose a number simply because it appears in one particular record.
Do sloped ceilings affect a home’s square footage?
They can affect how an area qualifies for reported living space, depending on the measurement convention that applies. Record the floor area and describe the ceiling slope rather than assuming the whole space counts or none of it does. Then review the applicable listing instructions. If the requirements remain unclear, keep the area distinct from figures you can classify confidently.
Can I use an online floor plan or assessor record as my listing measurement?
You can use either as a reference, but first check what the source measures and when it was created. An online floor plan may reflect a particular layout or set of inputs, while an assessor record may describe area collected for its own purpose. Compare the document with the home and your notes, then follow current listing instructions before using a figure in the listing.