Congress Realty provides flat-fee MLS listing services and professional photography for Phoenix sellers. The best time of day to photograph a house depends on its orientation, the rooms and outdoor features you want to show, and the day’s weather.
Morning light can brighten one side of a home and leave another in shadow. Harsh sun, glare, and dark interiors can also distract from the features buyers need to see. Instead of choosing one ideal hour for every image, match the shoot time to the home’s light and your priority views. This guide will help you plan a practical shoot, prepare the key spaces, and stay in control of the process.
Key Takeaways
- Choose the best time of day to photograph a house based on the light on the views you want to feature.
- Observe the home at different times and use what you see to set the schedule, rather than relying on compass direction alone.
- Plan separately for exterior shots, bright or shaded rooms, and views through windows.
- Prepare a shot list and handle practical tasks before shoot day to keep the session focused.
- Clear, well-planned photos support your listing. Congress Realty offers listing services that include professional photography.
When Is the Best Time of Day to Photograph a House in Phoenix?
The best time of day to photograph a house is when its important views look clear and evenly lit, without distracting glare or shadows. Choose the timing for each image based on its subject, rather than assuming one hour will work for every angle.
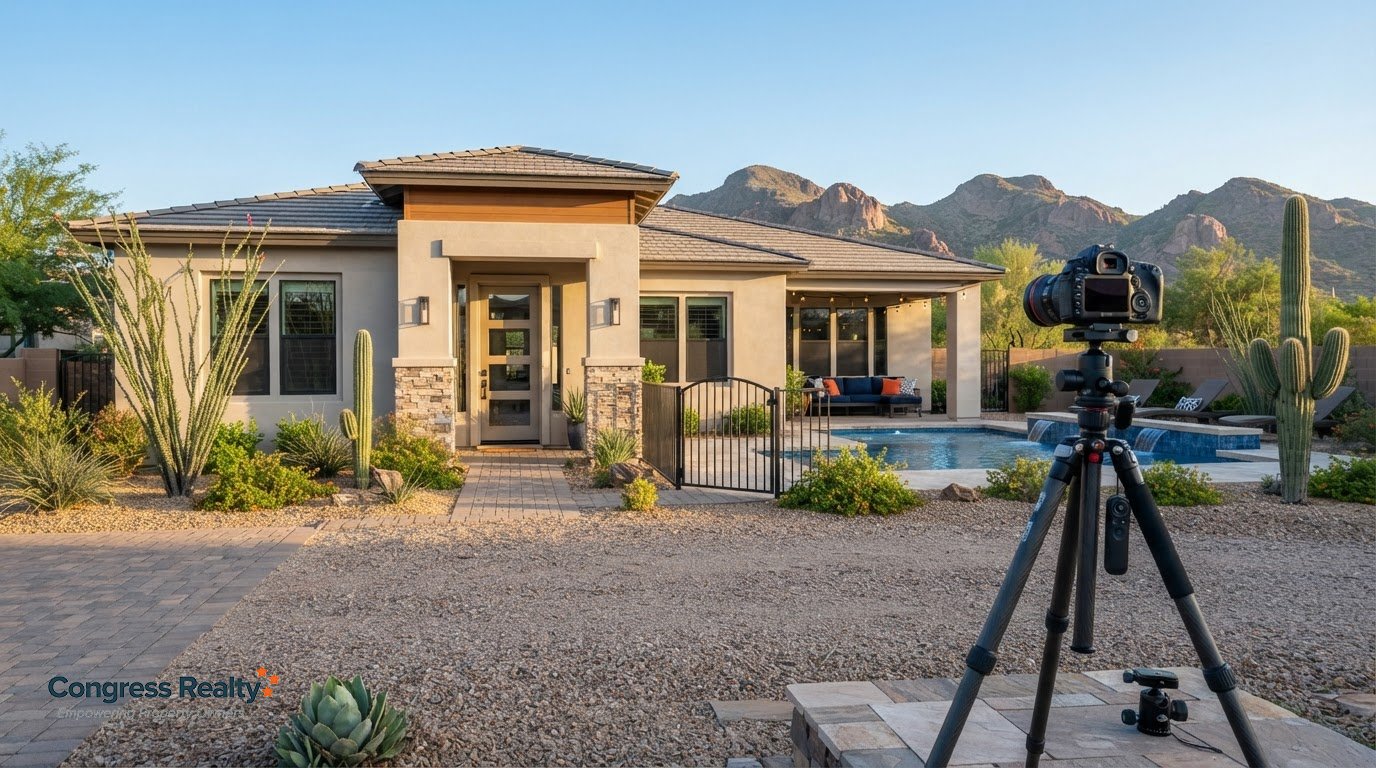
A front exterior may look strongest when sunlight reaches it evenly. A backyard may need a different window to show its patio, landscaping, or pool without harsh reflections. Indoors, window direction and room layout affect how much natural light reaches the space. Cloud cover can soften sunlight or make an exterior look dimmer, so assess the actual scene before settling on a schedule.
Why sunlight changes a home’s appearance
Sunlight affects the brightness, shadows, and detail a camera can capture. Direct sun can bring out color and texture, but it can also create sharp shadows or glare on windows and light-colored surfaces. Softer light may reveal details more evenly, though it can make a façade look less bright. These photographic lighting principles explain why timing changes how a home appears in an image.
For example, early light may brighten an east-facing front wall and show its details. Later, the wall may sit in shade while stronger contrast appears elsewhere in the frame. The home stays the same, but the direction and strength of the light change.
Start with the photograph you need
Before choosing a shoot window, decide which views matter most to buyers. Prioritize features that help show the home, then consider the light each one needs. This makes timing a practical decision rather than a guess.
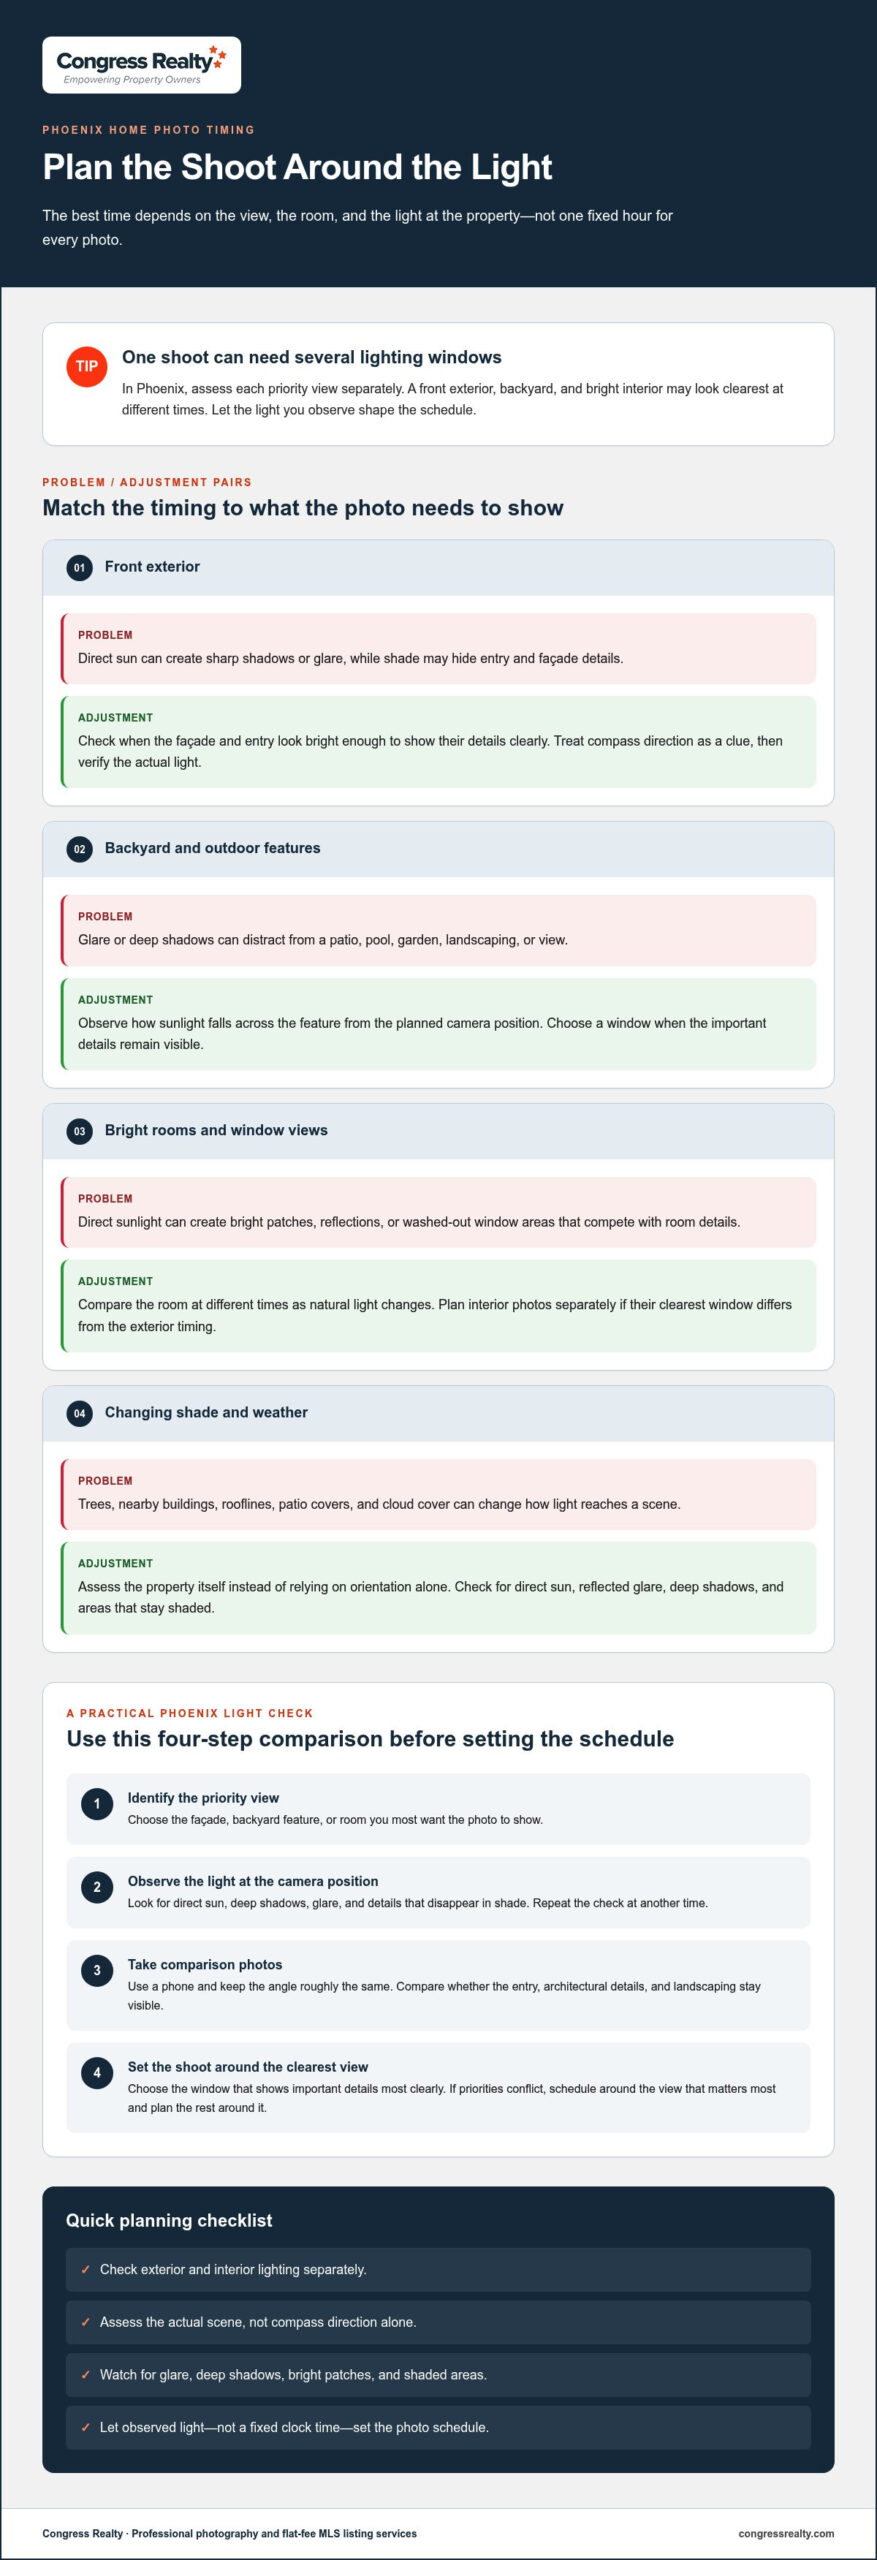
- Front exterior: Look for a time when the façade and entry are bright enough to show their details clearly.
- Backyard: Check how sunlight falls across the patio, pool, garden, or view, and watch for glare or deep shadows.
- Interior: Identify rooms that rely on window light. Note whether direct sun creates bright patches or reflections.
Exterior and interior images may need separate lighting windows, so don’t assume one appointment time will suit every shot. If the priorities conflict, schedule around the view that matters most and plan the rest around it. Congress Realty offers flat-fee MLS listing options and professional photography, giving sellers a way to prepare their listing while staying involved in the process.
How Phoenix Home Orientation and Sunlight Shape Photo Timing
A compass direction gives you a useful starting point, not a guaranteed photo schedule. Nearby buildings, trees, rooflines, patio covers, and the camera’s position can change how sunlight reaches a façade. Check the property itself before choosing a shoot window. A west-facing front may be shaded by an obstruction, while a side yard may receive direct sun earlier than expected.
Use this process to choose a time based on what the camera will show:
- Identify the façade. Decide which side of the home the front-exterior photo will feature. Note its direction, but treat that as a clue, not a final answer.
- Observe sunlight. Look at the façade and other priority views at different times. Note when direct sun reaches them, where deep shadows fall, and whether windows or light surfaces create distracting glare.
- Test the planned window. Take a comparison photo during the time you’re considering. If practical, photograph the same view at another time from roughly the same position.
- Adjust the schedule. Compare the results and choose the window that shows important details most clearly. If a view looks shadowed or washed out, test another time before finalizing the plan.
How to observe the home’s light before the shoot
Check the views you plan to photograph, not just the front door. Stand where you expect the camera to be, then assess the façade, backyard, and any feature you want to highlight. Note direct sun, reflected glare, deep shadows, and areas that stay shaded. Repeat the check at another time to see how the light changes.
A quick phone photo can help you compare what you see. Keep the angle similar in each image and check whether the entry, architectural details, and landscaping remain visible. You aren’t judging the phone photo as a finished listing image. You’re looking for the time that gives the photographer a clearer starting point.
When morning or late-day light may work better
Morning and late-day light are options to test, not rules for every home. Morning may suit a view that receives direct light then, while late day may work better for a different side or outdoor feature. The right choice depends on the subject, camera angle, and what falls into shadow at that time.
Let the light you observe, not a fixed clock time, set the photo schedule. Once you’ve identified the important views and timing priorities, you can include that preparation in your sale plan alongside Congress Realty’s flat-fee MLS listing options.
How to Choose the Right Time for Exterior and Interior Photos
Exterior and interior photos don’t have to share the same ideal lighting window. A front façade may look clearer when the sun reaches it, while a bright living room may need a time when window light feels balanced. Assess each view on its own, then build the shoot around the features you most want buyers to notice.
Use this comparison to set priorities. It offers a starting point, not a fixed schedule. Check the actual rooms and views because sunlight and shade can shift across the property during a shoot.
| Photo type | What to look for | Timing consideration |
|---|---|---|
| Exterior | Visible entry details, landscaping, and balanced light across the façade | Test how direct sun affects contrast and shadows on the actual scene |
| Bright rooms | Clear room details without distracting glare or washed-out window areas | Compare the room at different times as natural light changes |
| Shaded rooms | Enough light to show the room’s layout and features clearly | Look for a window when the space feels brighter and evenly lit |
| Views through windows | A readable balance between the interior and the outdoor view | Check for reflections, glare, or a view that appears too bright |
Exterior shots: balance detail, brightness, and shadows
Direct sunlight can brighten a façade and reveal its color, but it can also create sharp contrast between sunny and shaded areas. Consider what the frame needs to show: the entry, landscaping, outdoor living areas, or street-facing view. A bright wall won’t help if deep shadows hide the doorway or glare distracts from the patio.
Test the actual scene instead of choosing a time based only on sunrise or sunset. Stand where the camera will face and check whether the main features remain visible. A covered entry, nearby tree, or wall can shade part of the view even when the rest of the exterior sits in direct sun.
Interior shots: work with windows and room brightness
Window direction affects when natural light reaches a room. Room size, wall placement, and nearby shade also affect how bright it feels. Open the curtains to see how outdoor light changes the space. Turn on practical lights only if they improve the room’s appearance. A lamp may help one corner while making another area look uneven, so review the full scene before deciding.
Windows can create a separate challenge. The room may look comfortable, but strong outdoor brightness or reflections can pull attention away from the interior. Check the window view and the room together, then decide which deserves priority in that image.
If ideal lighting windows conflict, rank the shots by importance. Give the strongest window to a defining feature, such as a distinctive entry or a room buyers should understand clearly. Schedule the remaining views when they look their best. The best time of day to photograph a house may mean one window for the exterior and another for interiors, not one compromise hour for every image.
How to Prepare a House Photography Schedule That Works
A workable photo schedule starts with the images you need, not a time picked at random. List the must-have views first, then note which depend on natural light. This keeps the plan focused on your priorities and leaves room to adjust if conditions change on shoot day.
Use three stages to stay organized:
The day before the photography session
Prepare the spaces that will appear in photos and make the planned views easy to access. Clear counters, put away personal items, and tidy the rooms you want to feature. Outside, remove anything that distracts from the yard or patio, such as stored equipment or loose clutter. You don’t need to redesign the home. Focus on helping buyers see the space and its features.
Write down your must-have images, such as the front entry, main living areas, backyard, or any feature you consider important. Beside each view, note whether it depends on a particular kind of natural light. If you’re selling your house on your own, this list can also help you keep listing preparation organized and seller-directed.
Before the shoot
Walk through the image list and make sure each room or outdoor area is ready. Clear a path to the spaces, open access to the entry and backyard, and check that curtains, furniture, and everyday items won’t block important features. Share your priority views and light notes with the photographer before setting the schedule. A short, clear list helps the shoot reflect your home instead of a generic timetable.
The shoot-day timing checklist
Light can shift during a session, so treat the schedule as a guide rather than a rigid order. Check the conditions before starting. If the priority exterior looks shaded or an interior feels too bright, photograph another view first. Return to the priority shot when the light improves.
- Confirm the must-have image list and identify the highest-priority views.
- Check how light falls on the planned exterior and interior scenes.
- Open curtains where natural light helps show a room clearly.
- Turn on practical lights only when they improve the scene.
- Photograph priority views during their most favorable observed light.
- Revisit important shots if the light changes during the session.
This plan keeps preparation manageable and helps you make decisions with confidence. The best time of day to photograph a house depends on the views you want to present, so confirm your priorities before setting the schedule. For listing support, explore Congress Realty’s home-selling options.
How Listing Photos Fit Into Selling Your Phoenix Home
Photos help buyers understand what a listing describes. A thoughtful set can show the home’s exterior, key rooms, and how spaces connect. For example, pairing a living room view with a photo of the adjoining dining area can help viewers understand the layout. Clear images support the listing’s presentation, but they don’t guarantee more views, a faster sale, or a particular offer.
Photography is one part of listing preparation. Keep the images consistent with the written property details so buyers can form an accurate impression. Use the listing to explain what a photo can’t show on its own, such as how a room functions or what features come with the property. Together, images and clear details give prospective buyers useful information as they decide whether to learn more.
Connect photography preparation with listing presentation
Consider the impression the full listing should create. A front view introduces the property, while interior and outdoor images provide context about its spaces and features. Review the selection as a whole. Make sure it presents the home accurately instead of relying on one dramatic image to tell the entire story.
Photos sit within a broader listing that includes written details and MLS exposure. Congress Realty offers listing services with different support options, so sellers can choose how they want to manage the process. Treat each element as part of one presentation: photos show the spaces, accurate details describe the property, and the listing brings that information together for prospective buyers.
A flat-fee MLS listing can be one way to manage the sale. Consider which tasks you want to handle yourself, where support would help, and how involved you want to be in decisions. Congress Realty serves sellers in Arizona, Alaska, California, Idaho, Louisiana, Montana, Nevada, New Mexico, Oregon, Texas, Utah, and Washington.
Choose a selling process that fits your needs
Before choosing a support level, consider your experience with selling, the time you can commit, and the parts of the process where you want guidance. You can retain control while deciding how much support suits your situation. A thoughtful choice can make the work more organized without requiring you to hand over every decision.
As you prepare your home for sale, connect the listing presentation with a process that fits your needs. Explore your home-selling options and choose a path that keeps you in command of the next steps.
Turn Your Photo Plan Into a Confident Next Step
Your photo schedule is one practical part of getting ready to sell. Use what you’ve learned about the home’s light to prepare the images, then decide how you want to manage the rest of the listing. The best time of day to photograph a house is the time that helps buyers see your priority views clearly, not a fixed hour that forces every image into the same conditions.
For your Phoenix sale, keep the next step manageable. Set your priorities, choose the level of support that fits your needs, and move forward at your pace. A thoughtful plan gives you a clear starting point while leaving you in control of the decisions ahead.
Explore your home-selling options and choose a path that works for you.
Frequently Asked Questions
Is morning or afternoon better for photographing a house?
Neither works best for every home. Choose the time when the side of the property you want to show looks clear and balanced. The best time of day to photograph a house might be morning for one façade and afternoon for a backyard or another side. Compare the planned camera views at both times, then prioritize the light on the feature you most want buyers to notice.
Can you photograph a house on a cloudy day?
Yes. Cloud cover can soften direct sunlight and reduce sharp shadows on an exterior. It can also make a scene look dimmer, so check whether the entry, landscaping, and other details remain visible. For interior photos, pay attention to how much daylight reaches each room. A cloudy day can still work if the planned views look clear and the images represent the home accurately.
What is the golden hour for real estate photography?
Golden hour refers to the first hour after sunrise and the last hour before sunset. The lower sun can create warmer, softer light, which may suit some exterior views. It won’t automatically flatter every façade or yard, though. Check whether the home’s key details remain visible and whether the light creates distracting shadows. Treat golden hour as a window to test, not a required appointment time.
Is midday too bright for house photos?
Not always. Strong overhead sunlight can create harsh contrast or washed-out areas, especially on bright surfaces. In some scenes, however, the higher sun may reduce long shadows across the view. Look at the actual façade or yard before ruling midday out. If the image loses detail in bright areas or shadows hide an important feature, shift that shot to a different time.
Should exterior and interior house photos be taken at the same time?
Not necessarily. The exterior may look clearest when sunlight reaches the façade, while an interior may photograph better when window light feels more balanced. A photographer can capture different areas in sequence as conditions change. Before the session, identify rooms or outdoor views with time-sensitive light so the shoot can prioritize them instead of forcing every image into one narrow window.
How can I tell which direction my house faces?
Stand near the front of the house and face outward toward the street. Use a compass, including one on your phone, to note the direction you’re facing. That gives you the approximate direction of the front façade. Then observe the sunlight on the actual home at different times. Trees, nearby buildings, and covered areas can affect the light, so direction alone won’t determine your photo schedule.